Redmine 1-Click Documentation
This reference explains exactly how the generated script installs Redmine, how resume works after interruptions, and where to inspect logs when troubleshooting.
Contents
1. How the installer works
The installer is a single self-contained Bash script. It runs sequentially through a fixed set of steps, displaying a progress bar for each one. The total number of steps is 18 for a standard installation, or 19 if SSL is enabled (Let's Encrypt or manual certificate).
The steps are organised into the following phases:
-
1Preflight checks Verifies root privileges, OS compatibility, required config values, and detects a previous partial run to resume from.
-
2System update & dependencies Runs
apt-get update,apt-get upgrade, and installs the system packages and libraries needed to install Ruby and run Redmine. -
3Swap setup If total swap is below 1 GB, a 2 GB swap file is created automatically. This protects low-RAM VPS instances when Ruby needs to be compiled as a fallback and is not counted as an installation step.
-
4Database installation & configuration Installs the chosen database server (MariaDB or PostgreSQL), enables the service, and creates the Redmine database and user.
-
5Ruby installation (package-first) Attempts to install the required Ruby version from OS packages first (fast path). If that exact version is not available as a package, it falls back to
rbenv/ruby-buildin/usr/local/rbenvand compiles Ruby. Bundler is installed afterward. -
6Redmine installation Downloads the Redmine source archive, extracts it, writes
database.yml, runsbundle install, generates the secret token, runs database migrations, loads default data, and sets the admin account credentials. -
7Web server installation & configuration Installs Apache or Nginx with Passenger, writes the virtual host configuration, and enables the site.
-
8SSL certificate Only present if SSL mode is Let's Encrypt or manual. Runs Certbot or configures the provided certificate files.
-
9Log rotation & summary Writes a
logrotaterule for Redmine logs, then prints a summary with the access URL, credentials, and useful paths.
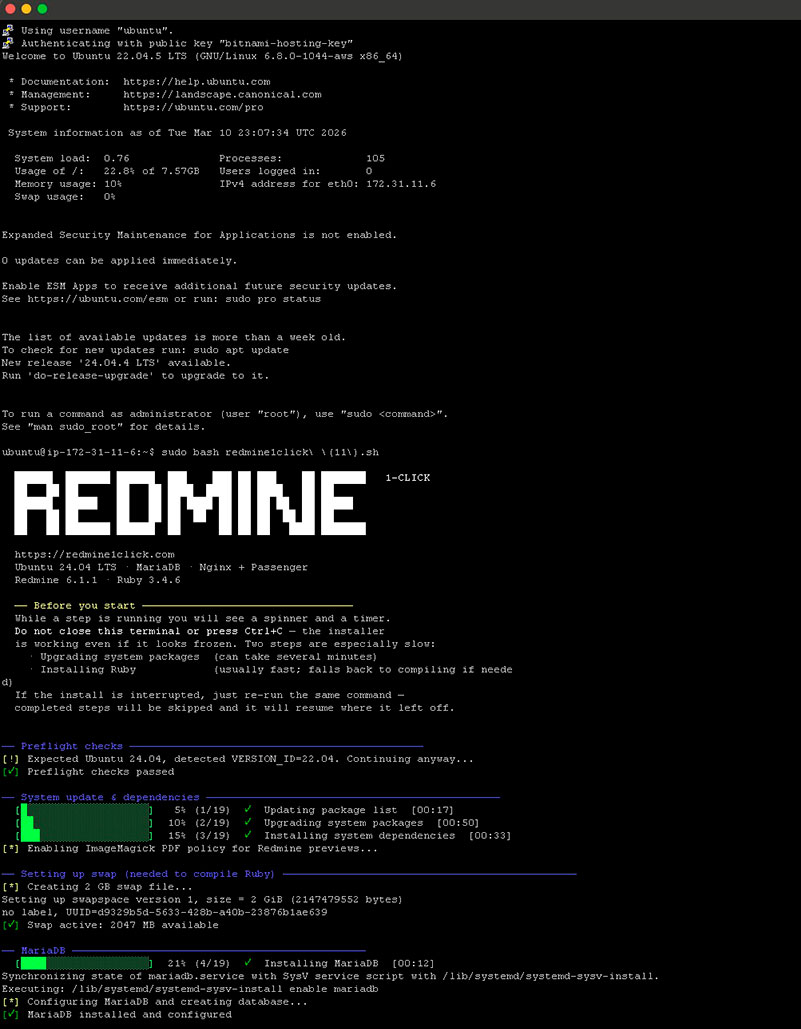
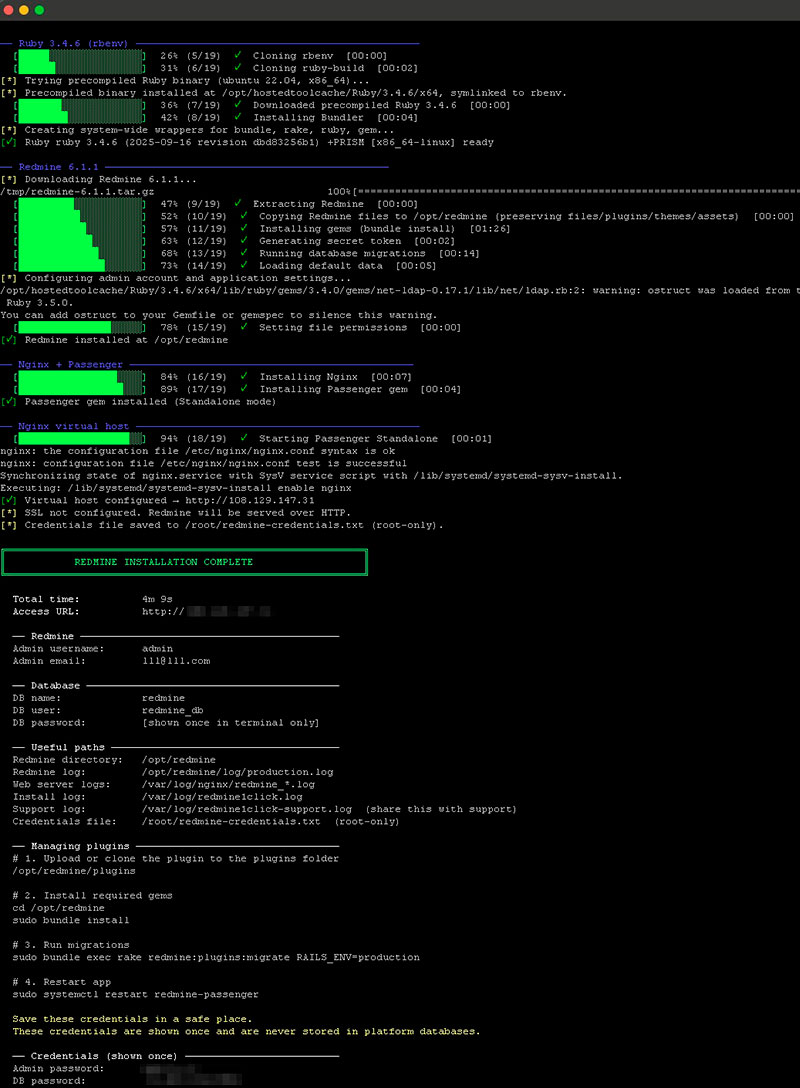
What it looks like
These screenshots show a real installation on Ubuntu 22.04 with MariaDB and Nginx. The installer displays a progress bar with step count, percentage, and elapsed time for each phase.
 Click to enlarge
 Click to enlarge
2. Slow steps, interruptions & resume
Steps that take the longest
While a step is running, the terminal shows a spinning indicator and an elapsed timer. The installer is working even if it appears frozen — do not close the terminal or press Ctrl+C. Two steps are significantly slower than the rest:
| Step | Typical duration | Why it is slow |
|---|---|---|
| Upgrading system packages | 2 – 10 min | Downloads and installs all pending OS updates. Duration depends on how many packages need updating and the server's network speed. |
| Installing Ruby | 1 – 20 min | The installer tries OS packages first (usually fast). If the required version is not available in packages, it falls back to compiling via rbenv, which can take 10-20 minutes on small VPS instances. |
Resuming after an interruption
After each successful step, the installer saves its progress to a state file:
If the script is interrupted (network loss, SSH disconnect, power cut, Ctrl+C)
or fails at a specific step, simply re-run the same script with sudo.
It will detect the state file and skip all already-completed steps, resuming
from where it stopped.
The state file is deleted automatically when the installation completes successfully.
sudo rm /var/log/redmine1click.state
3. Error handling — abort vs. continue
Not all problems are treated equally. Some conditions stop the installation immediately; others produce a warning and allow the script to continue.
Conditions that abort the installation
The script exits immediately and displays an error message.
| Condition | When it is checked |
|---|---|
| Script not run as root | Preflight |
| OS is not Debian or Ubuntu (e.g. CentOS, Rocky, Alpine) | Preflight |
/etc/os-release is missing (OS cannot be detected) |
Preflight |
DOMAIN is not set |
Preflight |
REDMINE_ADMIN_EMAIL is not set |
Preflight |
| Redmine source archive cannot be downloaded (network issue or invalid version) | Redmine install |
| Any installation step fails (package install, compilation, migration, etc.) | Each step |
DOMAIN contains a path (/), protocol, or port number |
Preflight (normalized automatically; aborts if result is not a valid hostname or IP) |
When a step fails, the installer prints the last 30 lines of the step's output to the console and writes the full output to the log file. The state file is preserved so the installation can be resumed after the problem is fixed.
Conditions that generate a warning and continue
| Condition | What happens |
|---|---|
| Debian or Ubuntu version does not match the expected value | Warning printed; installation continues |
DOMAIN is an IP address and SSL mode is Let's Encrypt |
SSL is silently skipped; Redmine is served over HTTP |
DB_PASS is empty |
A random 20-character password is generated and shown in the final summary |
REDMINE_ADMIN_PASS is empty |
A random 16-character password is generated and shown in the final summary |
| Total swap is below 1 GB | A 2 GB swap file is created automatically before Ruby installation (mainly needed if fallback compilation is used) |
| The required Ruby version is already installed | Ruby install is skipped; the existing installation is used |
4. The installation log
All installer activity is written to a persistent log file:
What is captured:
- Every progress message, warning, and error printed to the console.
- The full
stdoutandstderrof each installation step — including apt output, gem installation details, compilation logs, rake output, etc. - On step failure: the last 30 lines of the failed step's output (also shown on screen).
- The final installation summary with URLs, credentials, and paths.
The log file is never deleted or truncated by the installer. Subsequent runs append to it, so it accumulates history across resume attempts.
systemctl enable calls for the database service
and the Rails runner that sets the admin credentials. If these fail, the error
still aborts the script (due to set -e), but the output may not be
as clearly labelled in the log as regular step output.
To follow the log in real time during installation:
5. Credentials & sensitive data
Passwords are not kept in our database or transaction records. They exist on our server only temporarily during the checkout process and inside the generated script file during the 48-hour download window, then are permanently deleted. Configuration data (domain, database name, admin username, etc.) is also kept temporarily for up to 48 hours and then permanently deleted. Credentials and server commands are shown once and cannot be recovered later. Save them in a secure place before closing the page.
During installation, credentials are also written on the target server to:
This file is created with root-only permissions and is intended as your local recovery copy.
What to share with support
Share the sanitized support log only:
Do not share /root/redmine-credentials.txt or any raw credentials unless you have rotated them first.
6. Email notifications
The installer does not configure outgoing email. SMTP credentials (server address, username, password) are sensitive authentication data, and we deliberately avoid collecting or transmitting them through our infrastructure.
After installation, Redmine works normally without email — notifications are simply not sent until you add your SMTP settings to the configuration file on your server:
For a complete walkthrough — including example SMTP settings for Gmail, Microsoft 365, Amazon SES, and other providers — see the dedicated guide: